
Garage Door Won't Close: A Diagnostic Walkthrough
A step-by-step walkthrough for the most common reason garage doors stop, reverse, or refuse to close all the way, plus a clear line for when it's time to stop troubleshooting and call a technician.
Start Here: What 'Won't Close' Actually Means
"My garage door won't close" actually covers several different problems, and figuring out which one you have is most of the battle. Some homeowners mean the door starts down and then reverses back open on its own. Others mean it stops partway and just sits there. Some mean nothing happens at all when they press the button. Each of those points somewhere different, so before you touch anything, watch the door go through one full cycle and note exactly what it does: does it move at all, does it stop at a consistent spot, does it reverse immediately or only after touching the floor, and does the opener's light blink a certain number of times when it fails?
Most residential openers built in the last two decades have a small light on the motor unit that flashes an error code when something stops the cycle. If your opener has this, count the flashes before you start troubleshooting anything else. You may not have the model number handy to decode the exact code, but the flash count itself is useful information to have ready if you end up calling a technician, since it narrows things down faster than a general description.
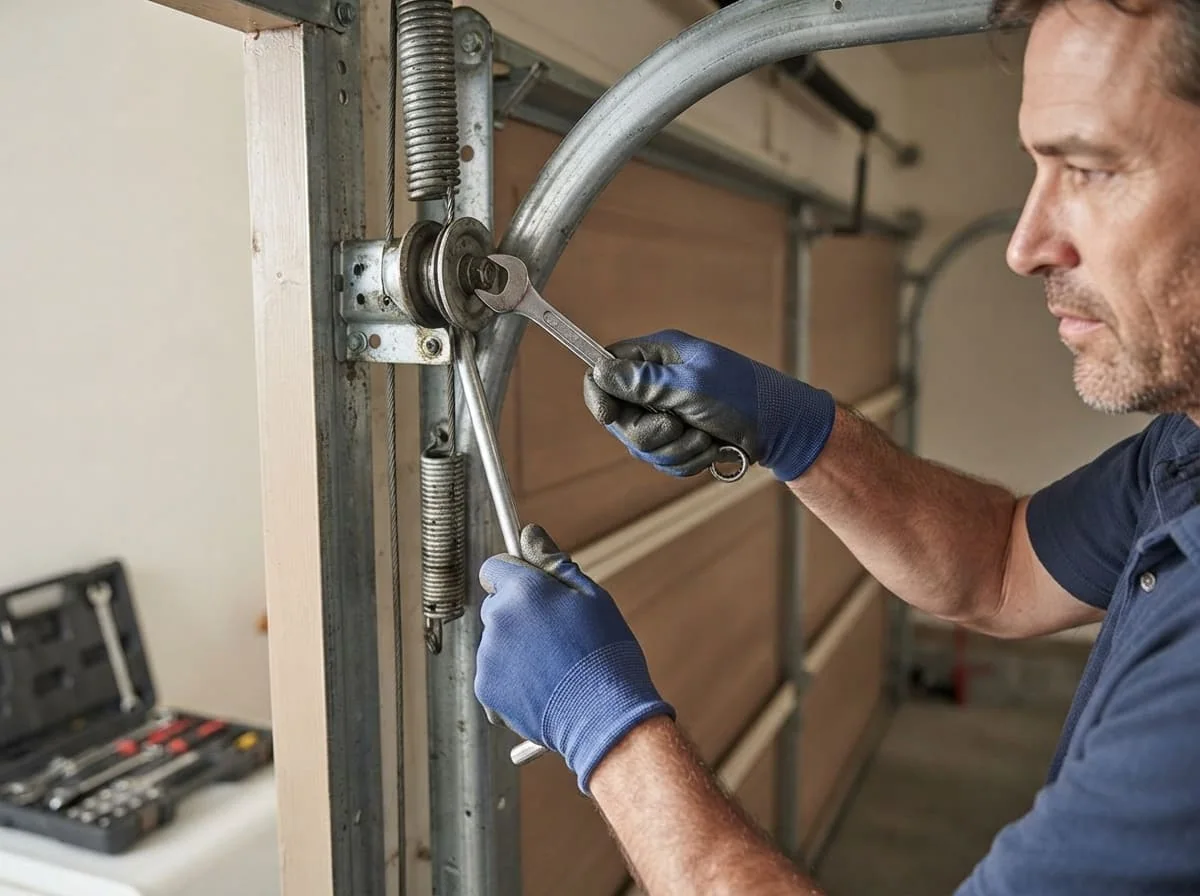
This walkthrough moves through the causes in the order we'd actually check them on a service call, starting with the fastest and safest checks and working toward the ones that call for more mechanical knowledge. None of the steps below involve the torsion spring system, the cables, or anything under tension. If your troubleshooting leads you toward the spring, stop — that's the one area of a garage door where a small mistake can cause a serious injury, and it's covered separately later in this article.
Step 1: Check the Safety Sensors First
By a wide margin, the single most common reason a garage door starts closing and then reverses is a problem with the photo-eye safety sensors — the two small boxes mounted near the floor on either side of the door track, usually four to six inches up. These sensors project an invisible infrared beam across the doorway. If anything breaks that beam while the door is closing, federal safety standards require the door to stop and reverse rather than keep coming down. That's a good thing when it's working correctly. The problem is that the sensors are also the part of the system most likely to get bumped, misaligned, or dirty, especially in a garage that sees bikes, garden tools, or kids' toys rolling past.
Walk out to the sensors and look at the small LED light on each unit. On most brands, a solid light on both sensors means good alignment; a dim, flickering, or off light on one side usually means it's aimed slightly away from its partner, or that something is blocking the beam. Wipe both lenses with a soft, dry cloth first — sawdust, cobwebs, and a film of garage dust are enough to weaken the beam even when the sensors are perfectly aligned. If cleaning doesn't fix it, gently loosen the wing nut or bracket screw on one sensor and nudge it a fraction of an inch at a time while watching the indicator light, then retighten once it's steady.
Also check for anything physically in the beam's path: a broom leaning against the wall, a low-hanging storage shelf, even direct sunlight hitting one sensor at a certain time of day can occasionally interfere with it. If you've had recent work done in the garage, or a car bumper has clipped a bracket, that's often the trigger. We cover sensor troubleshooting in more depth, including how to tell a wiring problem from an alignment problem, in our dedicated safety sensor guide.
Step 2: Look for Track Obstructions and Misalignment
If the sensors check out clean and aligned, the next place to look is the track itself. Garage door tracks are bolted to the wall and framing on both sides, and over years of use — plus the freeze-thaw cycle we get every winter here in Joliet — those brackets can loosen just enough to let a track shift out of true alignment. A door doesn't need to be dramatically bent to bind; even a small gap or a slightly pinched section of track can create enough resistance that the opener's safety system reads it as an obstruction and stops the cycle.
Open the door partway and visually trace both tracks from the floor up to where they curve into the horizontal section. You're looking for a few specific things:
- Gaps where the track has pulled away from the wall bracket, or bent bracket hardware
- Visible dents, kinks, or flat spots in the track's rail
- Debris — leaves, gravel, a stray tool, or ice buildup in winter — sitting inside the track's channel
- Rollers that look worn, cracked, or missing their bearing sleeve
Nylon rollers in particular get brittle with age, and cold weather accelerates that process. A roller that's chipping or squared off at the edges will bind at the same spot in the track every time, which often shows up as the door struggling near the same point in its travel on every cycle. If you spot a section of track that's visibly bent or pulled loose, don't try to bend it back into place yourself — that's a job for a technician, since a compromised track under a moving door carries real risk. Our track repair and off-track door service pages go into more detail on what's involved in a proper fix.
Step 3: Check the Close-Limit Setting
Every garage door opener has a "close limit" setting that tells the motor exactly how far to travel before it considers the door fully closed. If that setting has drifted — which can happen after a power outage, a recent battery change on some models, or just years of vibration — the opener may think the door is closed before it's actually reached the floor, or it may ask the door to travel further than it physically can, which the safety system reads as resistance and triggers a reversal.
Signs this is your issue: the door consistently stops at almost the same height every time, short of fully closed, without any obvious obstruction in the sensors or track. Most openers have a set of adjustment dials or buttons on the motor unit itself, usually labeled "up limit" and "down limit" or similar. The exact adjustment procedure varies enough by brand and age that we'd rather point you toward your owner's manual than give a generic set of turn-counts that might not match your unit — a limit adjustment that's slightly off in the wrong direction can cause the door to slam into the floor or reverse hard against the header, neither of which you want to guess your way through.
If you don't have the manual and can't find the model number, a technician can usually reset limits accurately in a few minutes, and it's worth having done correctly rather than working through trial and error on a system that's already showing signs of drift.
Step 4: Check the Force Setting
Separate from the limit setting is the "force" setting — how hard the opener's motor pushes before deciding it's met resistance and reversing. This exists specifically as a safety feature: if the door meets an obstruction (or a person), the opener is supposed to stop and reverse rather than keep pushing. But a force setting that's too sensitive will trigger on completely normal resistance, like the door being slightly heavier on one side, a touch of stiffness in cold weather, or rollers that need lubrication.
This is one of the most overlooked causes of a door that reverses for no obvious reason, especially in winter. Cold temperatures thicken the grease in an opener's chain or belt drive and stiffen door hardware generally, so a force setting that was fine in July can become marginal in January without anyone touching a single dial. If your door reverses more often on very cold mornings than on mild days, force sensitivity combined with cold-weather stiffness is a reasonable first guess.
Like the limit setting, force adjustment is done through dials or a programming sequence on the motor head, and the correct range differs by model and by the door's actual weight. Setting force too high defeats the safety purpose of the feature entirely, so this isn't a setting to crank up just to make the symptom stop — if your door needs meaningfully more force to close than it used to, that's usually telling you something else is wrong (worn rollers, a binding track, or spring tension that's drifted) rather than telling you to compensate at the opener. If you're not confident diagnosing which of those it is, that's a reasonable point to bring in a technician rather than keep adjusting.
Step 5: Rule Out the Remote, Keypad, and Wall Button
If the door does absolutely nothing at all — no motor sound, no light, nothing — before assuming a bigger mechanical problem, rule out the simple stuff. Check that the opener is plugged in and that the outlet has power (a tripped GFCI outlet in the garage is a very common, very unglamorous cause). Try the wall-mounted control button directly; if that works but your remote and keypad don't, the problem is almost certainly the remote's battery, a keypad that's lost its code, or a programming mismatch rather than anything wrong with the door or motor.
Remotes and keypads can also fail to communicate because of interference. A new device on the same radio frequency, a keypad battery that's low but not fully dead, or even a solar-powered yard light using the same frequency band has been known to cause intermittent failures. If your remote used to work and now works only sometimes, or only from close range, weak batteries are the most common explanation and the cheapest to rule out.
If the wall button also does nothing, and you've confirmed the unit has power, the issue is likely internal to the opener itself — a failed circuit board, a worn-out drive gear, or a motor that's reached the end of its service life. That's a legitimate reason to call for opener repair rather than keep testing components in the dark, since diagnosing a dead motor unit safely usually means opening the housing.
Step 6: Check for a Locked or Disconnected Door
Two mechanical possibilities are easy to overlook because they don't feel like "opener" problems. First, many garage doors have a manual slide lock or bolt near the bottom of the track, meant to secure the door when you're away for an extended period. If that's engaged, the opener will try to close the door, meet immediate resistance, and either stall or reverse — and it can look exactly like a force-setting problem even though the fix is simply sliding the lock back.
Second, check whether the emergency release cord — the red-handled rope hanging from the trolley on the ceiling track — has been pulled, whether by an adult reaching for something else, a curious kid, or accidentally during other garage work. When the trolley is disconnected, the opener runs its motor normally but the door itself doesn't move, because it's no longer mechanically attached to the carriage. Reconnecting usually means guiding the door down manually until the trolley re-engages with a click, then testing the opener again. If the door feels unusually heavy or unbalanced when you move it by hand with the release pulled, don't force it — that's often a sign of spring trouble, and it's a good moment to stop and call rather than keep working the door by hand.
When to Stop Troubleshooting and Call a Professional
Everything above is reasonably safe for a homeowner to check because none of it involves the torsion spring system. That line matters. A torsion spring is wound under significant tension to counterbalance the weight of the door, and it's rated for a certain number of open-close cycles before metal fatigue sets in — DASMA's published cycle-life guidance is one reason we always ask how old a spring is, not just whether it looks intact. A spring that lets go while someone is working near it can cause serious injury, which is exactly why we tell every new technician here about a coworker who was badly hurt that way years ago, before rushed spring work became something we refuse to shortcut.
Stop and call a technician if:
- The door feels unusually heavy, or noticeably lopsided, when moved by hand with the opener disconnected
- You can see a visible gap, separation, or curled section in the coil of the torsion spring above the door
- Cables look frayed, kinked, or off their drum
- The track is visibly bent, pulled loose from the wall, or the door has come off its rollers
- You've worked through sensors, limits, force, and the manual checks above and the door still won't close reliably
Danny Kowalski, who's run Joliet Garage Door Repair Solutions since 2015, still walks every technician through the same conversation before they touch a torsion spring unsupervised — it's not a step we skip for time. If your troubleshooting points toward the spring or cable system, or you've simply run out of straightforward things to check, that's the point to call rather than keep testing. We provide upfront, honest pricing and explain what we find before doing any work.
A Note on Winter in Joliet
A disproportionate number of "door won't close" calls we get between December and February trace back to cold-weather side effects rather than a single broken part. Illinois winters routinely bring January highs near 30°F and lows in the teens, and that kind of cold does several things to a garage door system at once: metal tracks contract slightly and can bind at brackets that were fine in summer, opener lubricant thickens and slows the drive mechanism, nylon rollers get more brittle and prone to chipping, and torsion springs themselves contract and carry more stress per cycle in cold temperatures, which is a documented factor in winter spring failures.
None of that means every winter symptom is a spring problem. Often it's simply that a marginal force setting or a slightly worn roller that caused no trouble in July finally shows up once the temperature drops. It does mean that if your door starts acting up specifically when it's cold outside, that's useful diagnostic information in itself, and worth mentioning if you end up calling for help.

Danny Kowalski
Owner and lead technician at Joliet Garage Door Repair Solutions, serving Joliet, IL since 2015.
FAQs
Why does my garage door start closing and then go back up by itself?
This is almost always the safety reversal system doing its job — either the photo-eye sensors are detecting an obstruction (or are simply misaligned or dirty), the opener's force setting is too sensitive for current conditions, or the door is meeting physical resistance somewhere in the track. Start by cleaning and checking alignment on the sensors, since that's the fastest thing to rule out.
Is it safe to keep pressing the button if my garage door won't close?
Pressing the button a few times to observe the door's behavior is fine and often how you gather useful diagnostic information. What you shouldn't do is manually force a door that feels heavy or unbalanced, hold the wall button down to override a repeated safety reversal, or keep adjusting the force setting higher to make a reversal stop happening — that defeats a feature that exists to prevent injury.
Can I fix a misaligned safety sensor myself?
In most cases, yes. Cleaning the lenses and gently adjusting the bracket while watching the indicator light is a reasonable homeowner task and resolves a large share of these calls. If the sensor wiring looks damaged, or alignment alone doesn't restore a steady light, that's a good point to have a technician take a look rather than keep guessing at the adjustment.
How much does it cost to fix a garage door that won't close?
It depends entirely on the cause — a dirty sensor lens or a loose lock might cost nothing to fix yourself, while a bent track, worn rollers, or an opener with failing internal components involves parts and labor that vary by what's actually needed. We provide free upfront quotes before any work begins, so you know exactly what's involved before committing to a repair.
How long does it take to diagnose a garage door that won't close?
Walking through sensors, track, limits, and force settings yourself usually takes fifteen to thirty minutes if you go step by step. A technician with the right diagnostic experience can often narrow it down faster on-site, particularly if the opener's error-code light is available to reference, since that alone points toward a specific subsystem.
My garage door won't close and it's below freezing outside. Is that related?
Very possibly. Cold weather thickens opener lubricant, contracts metal tracks and springs, and makes rollers more brittle, all of which can push a marginal component past the point of working reliably. If the problem only shows up on cold days, mention that when you call, since it helps point toward the right cause faster.
Have a Garage Door Problem Right Now?
Skip the guesswork — call Joliet Garage Door Repair Solutions for a fast, honest diagnosis.